
I’ve been wanting to do this project for some time, so I am excited to get this one in the books. Today I’m going to highlight the build steps and techniques of sewing a bug net for a hammock.
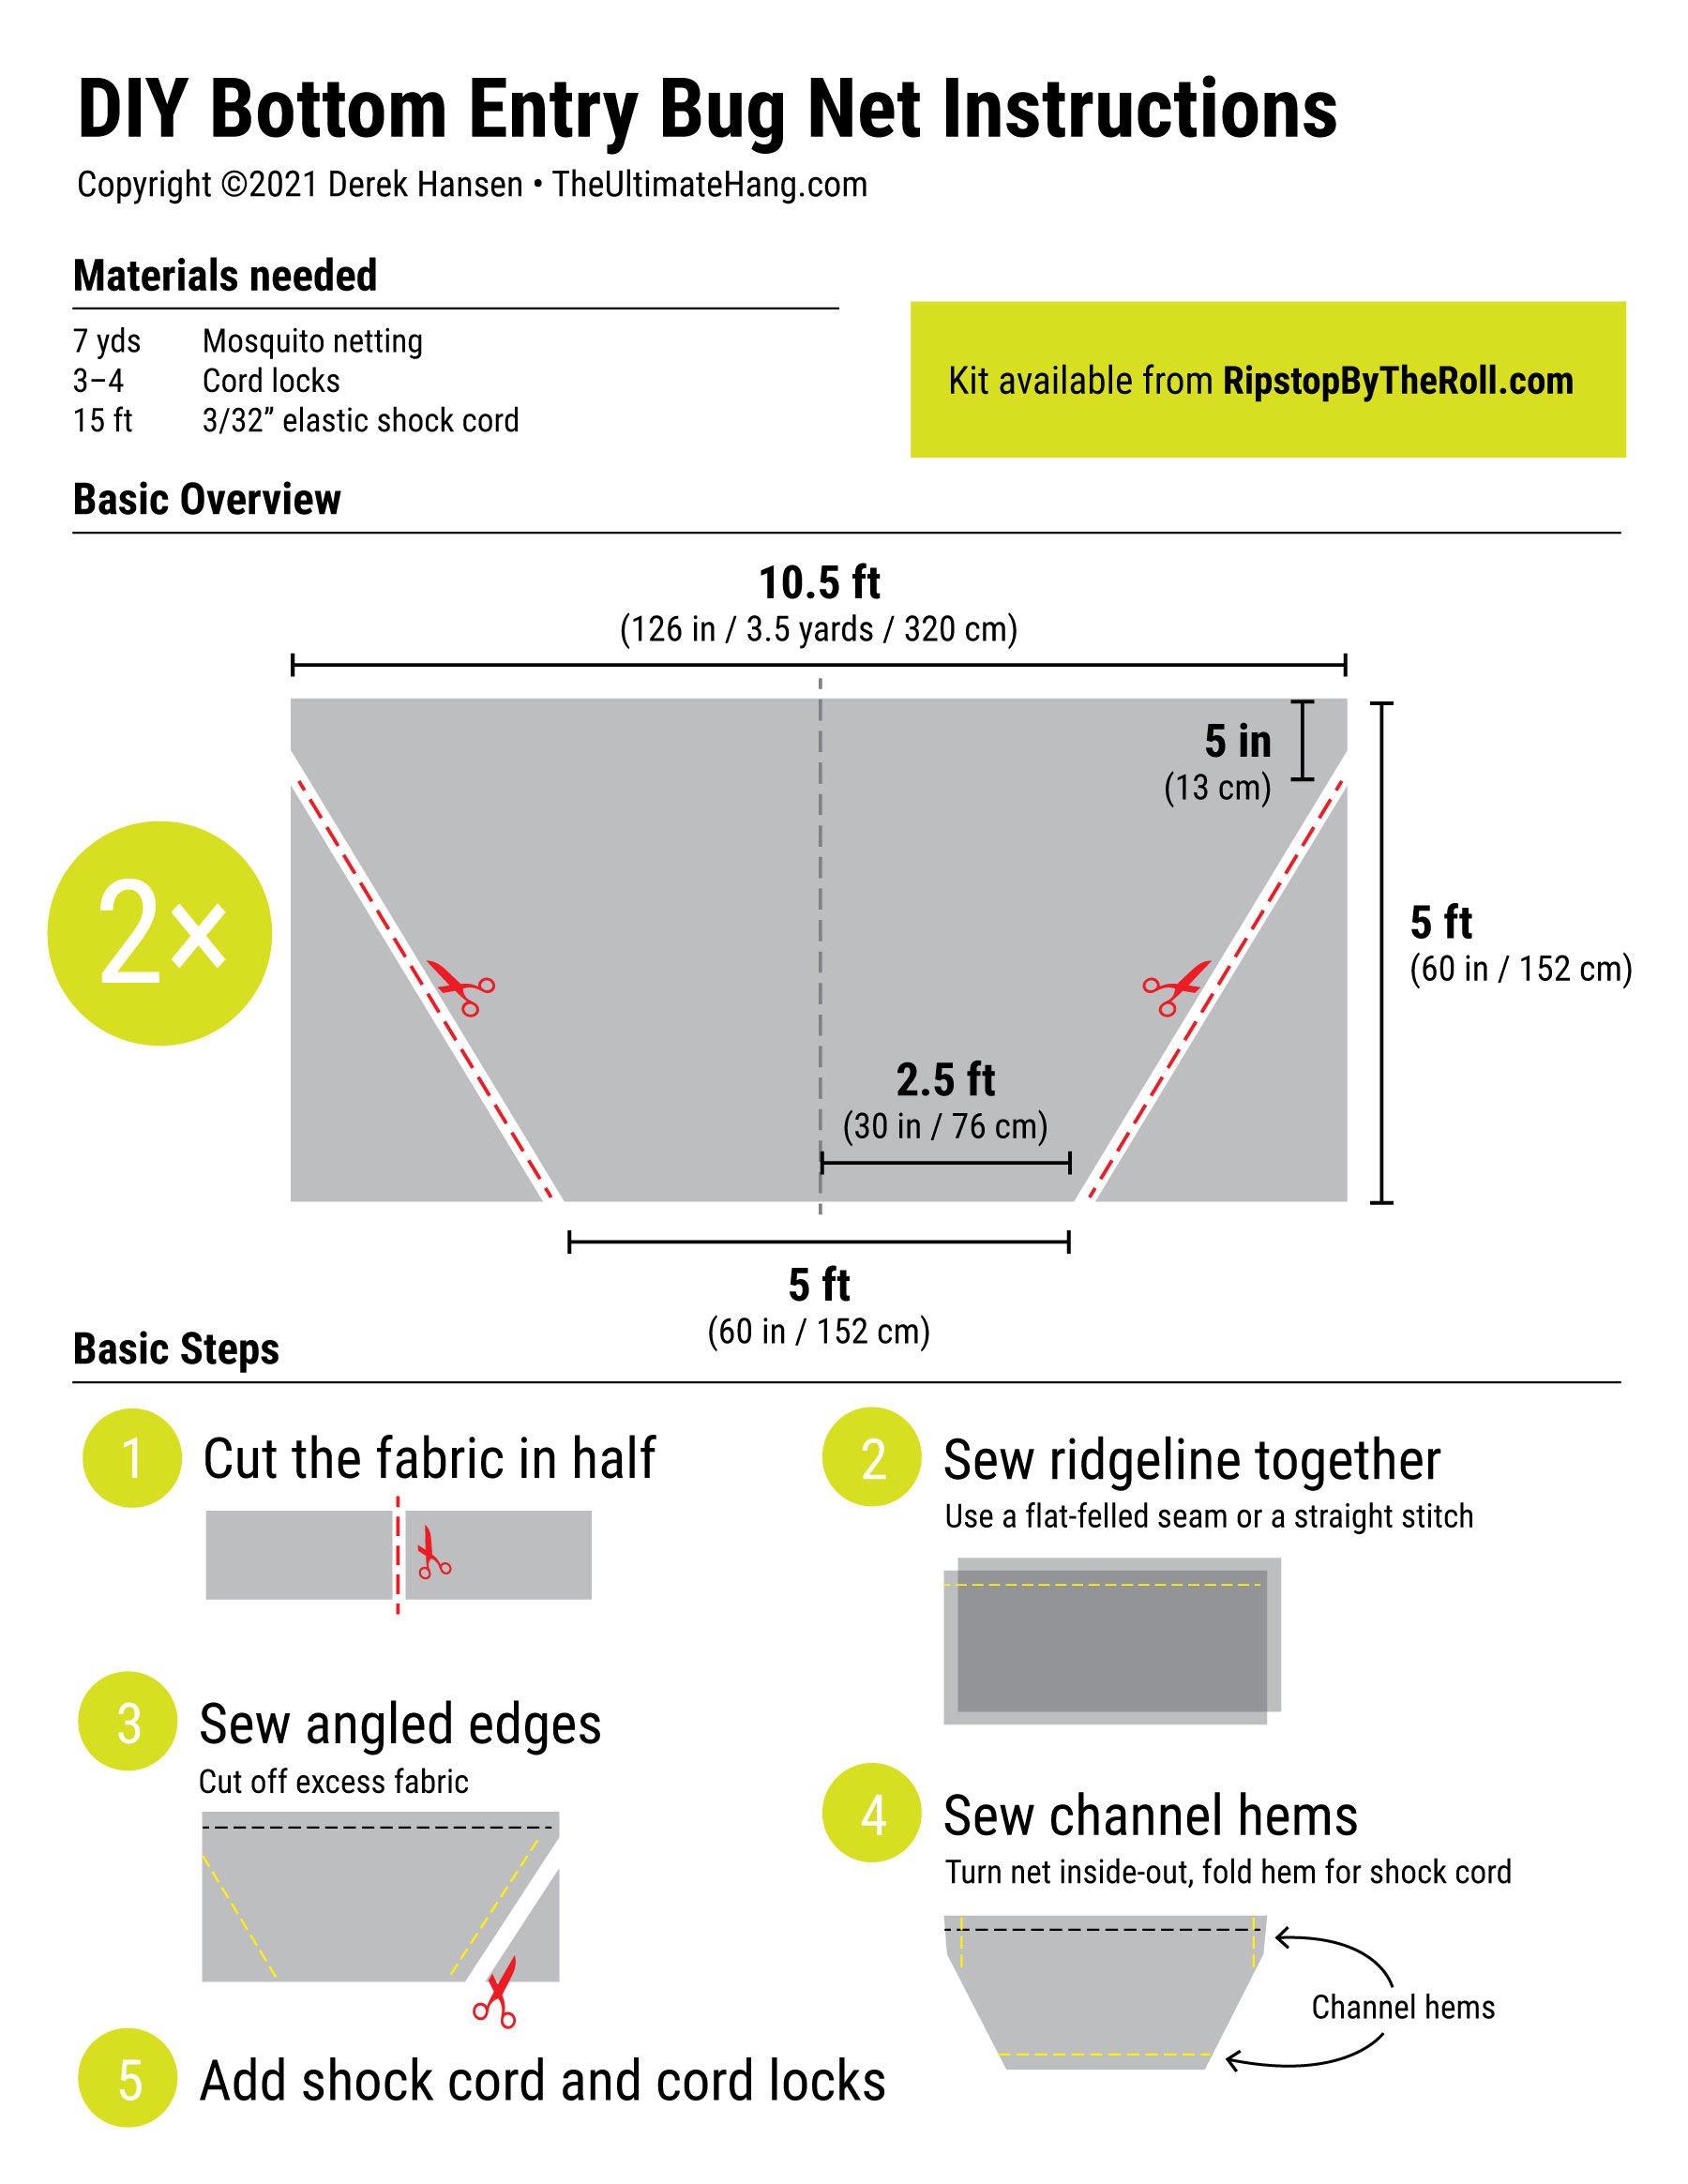
This will be a 360-degree bug net that completely surrounds the hammock except for an opening on the bottom that is loosely cinched with some shock cord. Often called a bottom-entry bug net.
This is a straightforward project, for easy-to-moderate skill level if you’re new to DIY projects. No zippers or complex patterns required.
We will use a basic straight stitch for all the hems and the main “complexity” will be a flat-felled seam along the ridgeline, which is actually easier to sew than you think.
You will need a basic sewing machine with nylon thread.
To make things easier, I purchased all the fabric and notions from Ripstop By The Roll. They sell a kit with 7 yards of no-see-um mosquito netting, 4 cord locks, and 15 feet of 3/32 shock cord.


Leave a Reply to Rick Cancel reply