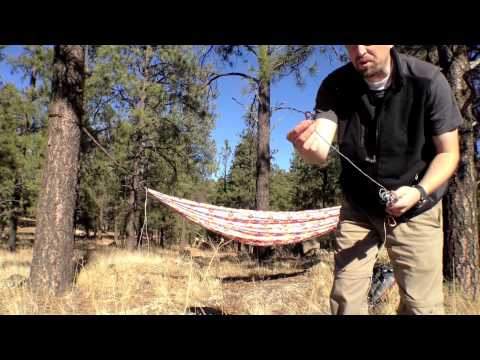
Video: Using Continuous Ridge Lines with a Tarp

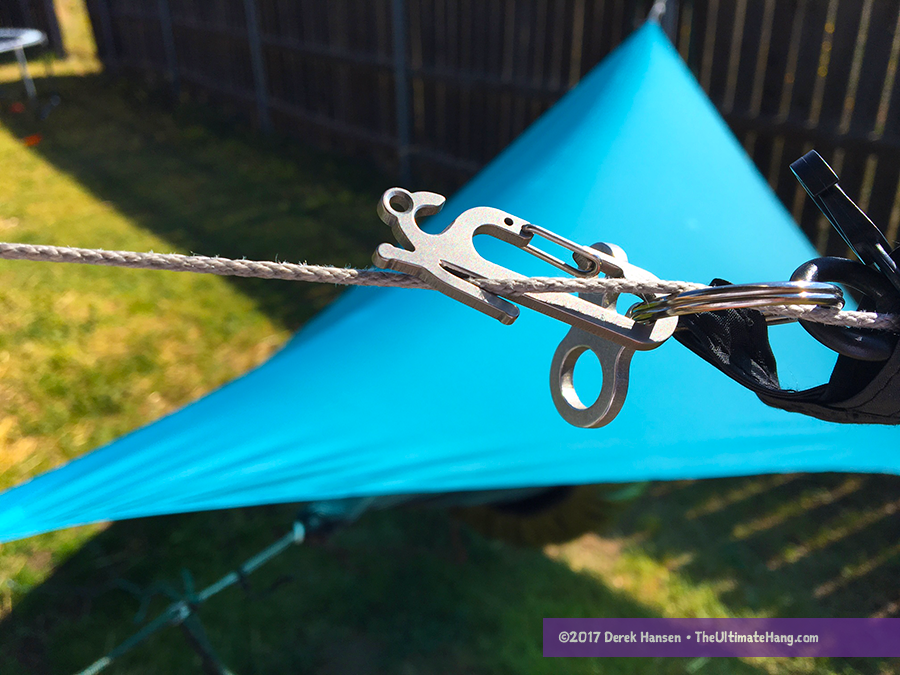
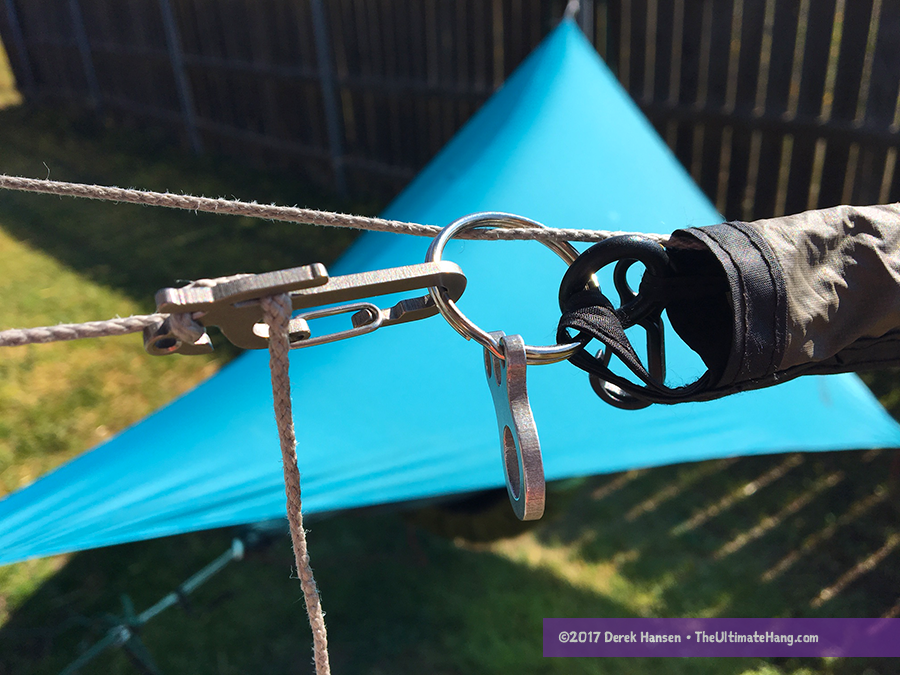
Here are two quick video segments demonstrating continuous ridge lines with a tarp. The first video is a live example of what I illustrated in my book, and elsewhere,  using two carabiners. The second video is a new method that I really like that uses one DutchWare Dutch Hook and one DutchWare Tarp Flyz (or Stingerz). Both methods link the ridge line into a sort of figure-8 loop that allows the tarp to slide back and forth easily so it can be centered over your hammock.

Read more: Knots vs. Hardware

I have illustrated several ways to tie up a tarp using hardware or no hardware and you’re probably wondering, “but which is the best way?” or “why not stick with just one?” For me, I enjoy having these different methods in my tool box depending on the situation. The no knot methods are important in case I’m left in a situation where that’s all I’ve got to work with. I really like the simple Dutch Hook/Tarp Flyz (or Stingers) method illustrated below because it is lightweight and the Dutch Flyz provides that mechanical advantage (similar to a Trucker’s Hitch knot) to tension the tarp close to the ridgline. I’ve found that Prusik knots tend to jam or get stuck on the line and can be difficult to tighten or loosen (especially when it gets cold).

Enjoy!

A Continuous Ridge Line for a Tarp using Two Carabiners

continuous-ridgeline-dutch-hook

Categories: , ,

Leave a Reply

Your email address will not be published. Required fields are marked *

This site uses Akismet to reduce spam. Learn how your comment data is processed.

69 responses to “Video: Using Continuous Ridge Lines with a Tarp”

  1. Richard Avatar
    Richard

    I saw this update a while ago, I’ve just searched half the blog to find it again and as always, many more struck my eye.

    One of the perks of living with my Grandma is her old stylle; I’ll try a curtain hook for now and I’ll ask a friend to weld one side to a loop.

    I’ll put the stinger on my birthday wish list ;). I’m trying spare kiting cord for the ridgeline upgrade, I believe it’s dyneema. be careful when buying this though, I got 20ft, not 2.0mm haha.

    Thanks for all these illustrations, they’re very well made.

  2. […] Tarp Flyz (4.5 g) are perfect for tarp ridge lines, providing 3:1 mechanical leverage to easily get a tarp taut with a quick, no-knot […]

  3. Jim Avatar
    Jim

    Hi Derek,
    Where did you get those carabiners?
    Thanks

    1. Derek Avatar
      Derek

      The mini carabiner? You can find those at a few cottage vendors like Arrowhead Equipment and DutchWare gear. They are also common on keychain sets.

      1. Jim Avatar
        Jim

        Derek, Thanks, I’ll check those two place out. Jim

  4. […] tarp sets up easily with just the two guy points and the ridge line. Replacing the line and using a continuous ridge line or other method is […]

  5. Fredrik Avatar
    Fredrik

    Hi Derek! I’ve been using this setup with two carabiners for a while, and love it! But now I’m thinking of getting a new (thinner and lighter) ridgeline. How much force do you recon it would have to hold for?
    KR
    Fredrik

    1. Derek Avatar
      Derek

      You can try 1 mm zing it. It holds well.

  6. […] do believe I need this. Simple, elegant, and it looks like it should prevent any slack in the tarp over my […]

  7. Jordan Avatar
    Jordan

    how do you make the prusik knot out of the utility line? I like this method and really want to do it but I’m having trouble visualizing it. should 30 ft of utility line be enough?

    1. Derek Avatar
      Derek

      Yes. 30 feet will be enough. Do a web search for prusik knot and you’ll get a how to.

  8. Marc Avatar
    Marc

    Has anyone experimented with running a continuous ridgeline through the ends of the hammock and splicing the hammock in place? Then the ends of the line could be either worked into an eye splice or each end of the line could be a whoopee sling. Thoughts?

    1. Derek Avatar
      Derek

      Yes I think this has been done. Folks who’ve used a single ring suspension often have done this but use one line as both suspension (whoopie sling) and ridgeline.

  9. Steve Avatar
    Steve

    Derek, having seen your video a while ago I switched one of my tarps over to the continuous ridgeline using Dutch Bling and I like it for the easy ‘centering of the tarp and the ‘V’. However, I can’t seem to take the tarp down without it hitting the dirt. In order to get it packed into the bishop bag you have to let go one end which means it all ends up on the ground.

    I know you must have a method of packing the tarp away without it touching the ground, could you tell me how it should be done please?

    Many Thanks.

    1. dejoha Avatar
      dejoha

      Great question. I should do a video on that. There’s a new step to my setup that is not illustrated that makes set-up and take-down easier. The same steps, when followed in reverse order, make it easy. If you use hardware on the adjustable side, like the Dutchware Tarp Flyz, I would hook the line briefly to the running line, then wrap around the tree. This keeps the tarp from sliding back toward the other side while I wrap the line around the tree. When I’m ready, I unhook this temporary connection and then tighten and wrap the Tarp Fly. For take-down, I do the same steps in the opposite order: I unhook the Tarp Fly from the standing end, hook it temporarily on the running line, and then I can take down the tarp without it slipping.

      Tarp connection, Step 1

      Tarp Connection, Step 2

      1. Steve Boulter Avatar
        Steve Boulter

        Excellent, very clearly explained, I shall try this next time I’m out. Many Thanks.

      2. Mark Neufeld Avatar
        Mark Neufeld

        This is a great tip. I just finished experimenting with a CRL with my Cloudburst tarp out in the backyard using a length of Zing-It I just got from Dutchware. (Can’t stop buying bling — I think I need an intervention…) Wish I’d read this first! One thing I thought I’d mention: Although Derek likes to get his Tarp Flyz/Stingerz as close to the tarp as possible, I used Dutchware Fleaz attached to the ridge line rings by 8″ loops of Zing-It. This method works well for me because I use snake skins on my tarp, and I can roll the snake skins over the loops when I’m not using them. If I attached the Fleaz (or Flyz or Stingerz) directly to the tarp rings, there’s be no place to roll the snake skins.

        Another thing I learned today is that prussik knots don’t work well at all on Zing-It. I tried a variety of cordage of different sizes (wrapped 5-6 times) and couldn’t get any to work *reliably* without slipping. One more reason to use a CRL, at least for me.

        1. dejoha Avatar
          dejoha

          That Dyneema cordage is super slippery! Thanks Mark.

        2. Steve Avatar
          Steve

          Mark, Glad this has all been useful. Using your “shortened loop” method, I’m guessing that the ‘V’ made by the tarp ridgeline is very small? Do you not find your hammock suspension hits the tarp ridgeline as it moves? (Or do you not pass your hammock suspension through the ‘V’ as intended?)

        3. Bayly Taff Avatar
          Bayly Taff

          Mark
          Could you send me a photo or video of your set up with 8″ loops of Zing-it. I would like to use snake skins but don’t like how the skins bunch up under Derek’s set up. My email is ihikebackwards@gmail.com. Thanks, Bayly

      3. Bayly Taff Avatar
        Bayly Taff

        Derek
        I would love to see a video of the above photos when you have time. Thanks, Bayly

  10. Steve Avatar
    Steve

    Ignore my last post. Just realised that I’d Mir-read Mark’s post..Doh!!

    1. Mark Neufeld Avatar
      Mark Neufeld

      No problem! So the loops to the fleaz don’t really affect the V — which I really like. I was thinking about getting Dutch’s continuous ridgeline setup, but then I wouldn’t have the V.

      BTW Derek reviewed the Therm-a-Rest Slacker Hammock Warmer a couple years ago, and I have one that I haven’t used yet. It’s going to be in the mid forties at night this weekend at the Mogollon Rim and I’m going to find out how well it works with a Warbonnet Ridgerunner, REI Flash sleeping pad, and a Kelty 20 degree bag. I did as Derek suggested and removed the elastic — I’m just going to lay it under the pad between the double layers of the hammock. I’m impressed with the warmth of the new REI Flash pad. I hope it will do until I my UGQ underquilt is delivered next month.

  11. Bayly Avatar
    Bayly

    Can you use snake skins when you set up a tarp like this?

    1. Derek Hansen Avatar

      Yes. It just makes the argument for keeping the line permanently connected to the tarp. Lots of folks do it.

  12. Roddy Jones Avatar
    Roddy Jones

    Hi Derek,
    Usual story: I somehow got intrigued by hammocking, found Shug, Professor Hammock and you, bought your book, quickly realised that there’s far more to hammocking than I would have guessed – but it’s such fun learning! I’m gradually assembling my gear and bought a jungle hammock (see? I’m learning!) from a boutique Tasmanian company called “Tier Gear” (I live in Australia), which in my novice opinion is a fantastic hammock. I’m now going through the complex tarp minefield and was pretty much convinced that two separate ridge ties would suit me until I came across your all-in-one continuous ridgeline. At first I couldn’t quite visualise it. I then found your two videos on it. Surely you were using some sort of trickery? So I rigged up an mock-up using a dyneema dogbone to act as the tarp’s length and some paracord (forgive me!), two keyring carabiners (really, forgive me!) and my kitchen table legs as the trees. It’s amazing! It’s such a clever idea! I don’t know how you thought of it, but I am so impressed that I felt compelled to tell you and thank you. The ease of adjustment plus the two Vs means there really is no trade-off.

    By the way, I thought of an analogy for the whole knots/hardware “debate”. To me, knots are learning your times tables in school, whereas the hardware is a calculator. Sure, a calculator is quicker and easier, but to understand what’s happening, you need to know your times tables. I have really enjoyed learning how to tie knots and splice dyneema, but on a hike in the pouring rain after a long day’s walking and growling belly, I want to set up my tarp as quickly as humanly possible. If the hardware fails, I can always go back to the fundamentals.
    Many thanks

    1. Derek Hansen Avatar

      Thanks Roddy! Great analogy.

  13. Glen MacPherson Avatar
    Glen MacPherson

    Hi, and thank you for your video. A silly question, because I have some chalenges with mechanical/spacial things. If I have, say, a 25 foot section of line, but I need to span only, say, a 14 foot gap between two trees on a certain day, how does this work with your setup? For sure I’ll keep one carabiner permanently clipped on one of the line, but the other end is confusing me. Is your system expandable/contractable in this type of situation? (By the way, hyper-specificity is never a problem with me!). Thanks.

    1. Derek Hansen Avatar

      A fixed carabiner on one end and a carabiner on the other end attached to an adjustable prusik or klemheist knot. You create a sort of figure-8, starting at one end of the tarp peak end, clip the fixed carabiner and take the line around anchor #1 and back to the carabiner. Clip the line back onto the carabiner and then over the tarp and repeat the process on the other side, only the other side is adjustable so you can take up slack and adjust the tarp back and forth over your hammock.

      1. Glen MacPherson Avatar
        Glen MacPherson

        Thank you. I actually don’t use hammocks, but I’m just looking for a quick and easy way to string up a ridgeline for my tarp. Your written description sounds very precise, but I’m afraid I can’t form a mental picture of what it means. But, I rewatched your video a few times and I think I’m good to go. Thanks.

  14. keith Avatar
    keith

    It took me way too long to figure out how you made that prusik knot and had it on the line but that was me, not you. Once it clicked in my brain I went outside and this idea worked perfectly. I need to tighten things up a bit and see how I need to adjust the caribeener but love it.

  15. David F Avatar
    David F

    I use toggles (such as sticks) or a girth hitch around the webbing holding the eye using a eye splice in the ends of my zip-it ridgeline. One nice thing about a toggle is you can use it like a cleat and toss half hitches around each end.

    Maybe why folks don’t like the continuous ridgeline is that it relies on friction to hold the chosen position, while the two-line form explicitly sets the positions. If I want to hold a particular fixed position, I’ll add another line on one end and prusik it partway up the V on the line running through the eye/grommet.

    If I want to separate the ridgeline tension from the tarp tension, I’ll run it continuous through both corners, with both the adjusting end and the fixed end attached to the same corner (foot-end for example) and then use a prusik or something to tension the tarp (head end for example) to against the taut ridgeline.