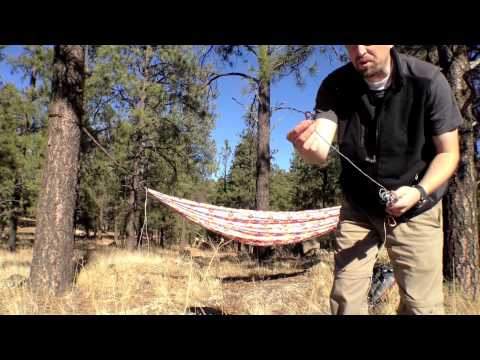
Video: Using Continuous Ridge Lines with a Tarp

Here are two quick video segments demonstrating continuous ridge lines with a tarp. The first video is a live example of what I illustrated in my book, and elsewhere,  using two carabiners. The second video is a new method that I really like that uses one DutchWare Dutch Hook and one DutchWare Tarp Flyz (or Stingerz). Both methods link the ridge line into a sort of figure-8 loop that allows the tarp to slide back and forth easily so it can be centered over your hammock.

Read more: Knots vs. Hardware

I have illustrated several ways to tie up a tarp using hardware or no hardware and you’re probably wondering, “but which is the best way?” or “why not stick with just one?” For me, I enjoy having these different methods in my tool box depending on the situation. The no knot methods are important in case I’m left in a situation where that’s all I’ve got to work with. I really like the simple Dutch Hook/Tarp Flyz (or Stingers) method illustrated below because it is lightweight and the Dutch Flyz provides that mechanical advantage (similar to a Trucker’s Hitch knot) to tension the tarp close to the ridgline. I’ve found that Prusik knots tend to jam or get stuck on the line and can be difficult to tighten or loosen (especially when it gets cold).

Enjoy!

A Continuous Ridge Line for a Tarp using Two Carabiners

continuous-ridgeline-dutch-hook

Categories: , ,

Leave a Reply

Your email address will not be published. Required fields are marked *

This site uses Akismet to reduce spam. Learn how your comment data is processed.

69 responses to “Video: Using Continuous Ridge Lines with a Tarp”

  1. Bean Avatar
    Bean

    Hi Instead of using a key ring which can open out why not use a continuous loop of dyneema (zing-it or lash-it) with the tarp flyz attached.

    1. Derek Avatar
      Derek

      Yes! This is a great mod and one that I’m also using now. The split keyring works fine if it is strong. I have pulled weak ones apart. My favorite split key ring came from a key remote dongle (featured in the video) — it’s small and strong. For me, they important point is to get the Tarp Flyz/Stingerz as close to the tarp as possible.

  2. Delroy Avatar
    Delroy

    It’s clear from your videos that the two carabiner method is superior. Easier to set up and adjust. I can see no advantages with the special hardware used in the second video.

    Many thanks for the clear information and diagrams.

    1. Derek Avatar
      Derek

      Thanks Delroy! The two-carabiner method has been a favorite of mine for a long while, thanks to the reasons you pointed out. There are a few advantages to other methods, but it does boil down to what works the best for you. If you’re counting grams, you could switch out one ‘biner with a Dutch Hook and it would still function the same. The Tarp Flyz saves some weight, but the real advantage for me is an easier method for adjusting and tightening the tarp (using the 3:1 mechanical advantage), and easier connect/disconnect compared with the prusik. I’m also a knot fan, and you can duplicate this technique using no hardware at all, but set-up and take-down take a little longer.

  3. Mike Avatar
    Mike

    I love these diagrams and videos. They are super helpful. I am thinking about going to the Dutch hooks and Stingerz, but had a question. I currently have a 2.2 lash it ridgeline, with a knot bone on one end and a figure 9 on the other. Tarp is connected with s biners and prussics. With the method in the videos, it seems like when you really try to crank the ridgeline tight,you are pulling right on the tarp d rings. Do you have any worries about breaking them? With my CRL, the tension is on the line only, because the prussics and s biners are independent from the line tension.

    Also, sometimes my tarp interferes with the suspension, even with the “V” setup. Do I just have to move the tarp higher, or find trees that are farther apart? Any other suggestions?

    Thanks.

    1. Derek Avatar
      Derek

      With a 3:1 mechanical force, you can get the line tighter than with just the prusiks, but I’ve yet to pull hard enough to break anything. The “figure-8” loop with the ridge line creates the “V”, allows the tarp to easily slide and adjust to center, and allows you to pull both sides of the tarp taut at the same time. It’s pretty neat. Just be careful and don’t go too crazy on getting it too tight.

      Getting a hammock to fit into the “V” created on the tarp depends on the length of the ridge on the tarp and the size of the hammock. An average size ridge line on a hammock is 108 inches, or 9 feet (274 cm). A tarp with a foot (30 cm) of overhang/coverage on each side is more than adequate, giving you a tarp with an 11 foot (335 cm) ridge line. When the tarp has a longer ridge line than you’ll have collision problems with the tarp even with the “V”.

      Hanging the tarp higher will eliminate this problem, but can create other coverage problems.

      The minimal asym tarp used stock by Hennessy works the best when it is very close to the hammock. This is one reason Hennessy designed the tarp to connect to the hammock suspension so it would connect as close to the top of the bug net as possible. Hung higher and an asym tarp begins to be less effective.

      Personally, I like tarps with about six inches (15 cm) of coverage on either side.

      1. Mike Avatar
        Mike

        Thanks, Derek. I think I will try the CRL with a Dutch hook on one end and a Stingerz. My tarp is an OES MacCat Deluxe, so it is 130″, over a Blackbird hammock, so I have a lot of coverage. I will play around with the height and the “v”. Thanks again.

  4. john Avatar
    john

    I just ordered some dutch clips, and tarp flyz to put on my crl. I have been using a zing it nacrabiner and prussic loop on the d ring of the tarp, seen here http://alturl.com/pfghe, about as light as you can get.

    But after hiking in cooler weather a couple months ago I decided to swap it to something I could do with gloves on.

    1. Derek Avatar
      Derek

      I hear you — working with line in the cold can be difficult. I like having different options in my skill set in cases like these.

  5. Robert Avatar
    Robert

    I really like the simplicity of the continuous ridge line for use with a tarp with just two carabiners.

    How would you configure the ridge line in case the tarp is used with tent poles instead of tree – in case no trees would be available or in case the tarp is used as a porch / cooking area to extend a tent.

    Would you route the ridge line around the spike on the top of the tent pole (i.e. use the tent pole as a very thin tree), or would you put a loop/ring in between the tent pole spike and the ridge line?

    I am struggling to find a suitable solution that allows for both the ridgeline to be securely attached between the tent poles and the prusik know to be applied in case of slack. (If I wrap the ridge line a couple of times around the spike when it’s all in position, I am no longer able to use the prusik to take out any slack later on without having to undo the couple of loops first.

    The rigidity/stability of the structure using the tent poles isn’t the issue (with 2 guy lines for each tent pole providing the counter force) but a suitable way to connect the ridge line to the tent poles…..

    Any help / guidance appreciated.

    Thanks

    1. Derek Avatar
      Derek

      I haven’t done any load testing so I don’t want to give out bad information, but I’ve been using it as a structural ridge line and it holds fine.

      I have roughly 180 lbs in my hammock, and according to my hammock hang calculator, that puts about 160 lbs of tensile force. The loop alien is working great!

  6. Chris Arvin Avatar
    Chris Arvin

    I’ve been wanting to try this method for a while. I’ve read about it a lot on the hammockforums. It seems every time I read about it though, there is always someone who says they’ve tried it and switched back to two lines. Even Shug, who I try to emulate the most, says he’s has gone back to using two lines.

    Today I tried it. I set it up a few times to make sure I gave it a fair shake. I’m going back to the two line method.

    Here’s my observations.

    Usually I can eyeball the two line method and get it pretty close to centered over the hammock. I might have to make a quick adjustment which means letting out a few inches of slack on one side and taking it up on the other. Or just letting out some slack on one side and taking it up with the four ground lines. The one line system saves time with the adjustment but IMO takes longer to setup. If I already have my hammock up, I almost always can get my tarp setup where I want it with the two line system on the first try by just making sure that the first end I secure is a foot over the end. The other end will then be a foot past the other end.

    The adjustment of the one line system cut into the trees I was using.

    I’ve had the one line system hit my hammock suspension before which causes the tarp to move around. I’ve never had that with the two line system. I hang my hammock suspension on different sides of the two trees. I hang my tarp from the other sides. No bumping.

    Less line to get tangled up with the two line system.

    Less change of the line sliding down the trees with two lines. Each is snugged up tight versus forming an open “V”.

    I hope this isn’t taken in a mean way. Just my research and findings on this method that will hopefully help others make a decision.

    1. Derek Avatar
      Derek

      Great observations. Now, I’d be careful with joining the Cult of Shug — pretty soon you’ll be unicycling and wearing wigs 🙂 In all seriousness, Shug is a great friend and he’s got a lot of hammock experience, but as you observed, there are preferences that each person will ultimately choose. I used to be a two-line devotee and then switched over to a continuous line for various reasons and conditions. Recently, I’ve been enamored with the “no-line” Hennessy tarp system of using the hammock suspension to clip the tarp. Each has trade offs and you’ve pointed out some in your post.

      To counter your points, for sake of argument, so much depends on your set up that may eliminate the issues you describe. For example, I’ve never had my hammock suspension collide with my tarp lines when I use the “V” set-up. My hammock suspension hangs between the “V” for both single line and continuous line tarp systems.

      For soft bark trees, I’ve used a sheath made from a hollowed out section of military 550 cord. It prevents the line from biting into the bark and makes for a quick adjustment.

      I’m surprised to hear that your tarp line doesn’t interfere with your hammock suspension if you clip your tarp line “snugged up tight” instead of using a “V”. You’d have to hang your tarp above the hammock suspension, which would position the tarp very high. Of course, none of that is poor style, per se, but for some tarp set-ups, such as an asym tarp or a smaller MacCat Hex, the best strategy is to pitch the tarp close to the hammock for maximum coverage. For stormy weather, pitching the hammock low is preferred as it maximizes protection without having to have large tarp panels that reach to the ground. This necessitates hanging the tarp line lower than the hammock suspension, which invariably creates a conflict (touching) between hammock and tarp suspension lines. It’s not a horrible problem, really, but for an asym tarp, a slight sway in the hammock can push the tarp out of alignment.

      Some folks prefer to stick to a system once they find something they like. For me, I often switch. I find value in most systems, and as I said, the trade offs may be a benefit in some cases and not in others. When I plan a backpacking trip I take that into consideration and pick the appropriate system and gear. Plus, I like keeping my skills fresh and I like trying new things, so you won’t see me advocating for one system. I may recommend one system for a particular audience or situation, but ultimately, I’m happy with whatever you choose. 🙂

      1. Chris Arvin Avatar
        Chris Arvin

        Derek said, “I’m surprised to hear that your tarp line doesn’t interfere with your hammock suspension if you clip your tarp line “snugged up tight” instead of using a “V””.

        Derek, I don’t think you understand how I set up the two line system. In the continuous system, you hang everything in a parallel line coming straight off the tree.

        What I do in the two line system is hang the hammock with the lines coming off the sides of each tree, each line coming off the opposite side which has the hammock hanging on a slight diagonal between the two trees. I just clip my biner onto the strap and just turn it to one side of the other and give a tug to set it. My tarp lines are hung off the opposite sides and thus are the width of the tree away from the hammock lines. In this way, I can hang the tarp lines below the hammock lines and never have them touch.

        Hope this helps.

        And thanks for such a wonderful source of information. I love to see and try all kinds of methods and this is a great resource allowing anyone to pick the best system for them.

        And for anyone who wants to know, I use the cheap figure 9s tied onto my tarp with a small loop. I use zing-it and it will slip under a heavy load with the figure 9 if installed per instruction. After I adjust it, I add a half loop which has completely stopped the slippage.

        1. Derek Avatar
          Derek

          Thanks Chris, that makes more sense now.

  7. Brandon Avatar
    Brandon

    How long is your continuous loop for your prusik knot?

    1. Derek Avatar
      Derek

      Not longer than 12 inches and then tied, so flat (doubled over) it is less than 6 inches. I make them smaller too.

      1. Brandon Avatar
        Brandon

        Thanks Derek!…I just downloaded your book and have been glued to my computer screen all day reading your delicious info…Thanks to you I didn’t get any of my stuff done today, but it was well worth it! My buddy and I are trying to break into hammocking and we believe in trial and error and trial by fire…so we’re having a blast. I’ll be using a lot of your info for my next trip and watching his jaw drop. I’m sure I’ll be back with more questions!

        Red

        1. Derek Avatar
          Derek

          Cool thanks. I hope you enjoy the book. I look forward to your questions.

      2. Brandon Avatar
        Brandon

        Also wanted to ask…I noticed that you use zing it/lash it style line for your ridgeline. I just order 100′ of Amsteel 7/64 for woopie slings and figured I have enough for guy lines and a ridge line after all is said and done. thoughts? I figured down the road I could switch it out. I know 550 paracord stretchs and retains water and I have a bunch for emergency and fun projects ofcourse. How long is your ridge line?

        1. Derek Avatar
          Derek

          7/64 is a bit thick for guy lines, but to each his own 🙂 a lot of folks use 7/64 for ridge lines and I think that would work great. A ridge line can add some structure to your hammock and most use 83% of the length of the hammock. So, a 10 foot hammock would have a ridge line around 100 inches. Adjust for your own perfect hang.

  8. jon Avatar

    thanks so much for the well done videos, learned lots i will apply this weekend on the Buffalo River. any advantage (or disadvantage)to stringing the ridgeline under the tarp vs. outside the tarp thru the grommets or d-rings? jon

    1. Derek Avatar
      Derek

      Tarps with catenary-cut ridge lines will work best with the ridge line above the tarp.

      Most tarps have straight ridge lines, which will work with a ridge line either above or below the tarp.

      In some storm conditions (particularly snow), having a ridge line below the tarp can help give extra strength, although it may not be completely necessary as the snow will shed if you pitch with steep angles on the fabric.

      There are many, many ways to pitch a tarp. Many of my scouts use generic “blue” tarps with metal grommets punched around the perimeter. For these tarps, I usually go very simple, using a single line without extra hardware. The scout ties two half hitches to one grommet (along the ridge line) then wraps the line around the tree and back through the same grommet. The line then goes under or over the tarp to the opposite grommet and through it. The line is then passed around the second tree and back to the grommet that the line was passed through. Before the line is tied and tightened, the scout can quickly slide the tarp to center it (or adjust its position). The line is then finished off with a taut-line hitch on the grommet and tightened.

      Regardless of what method you use (hardware, knots–trucker’s hitch, etc.), I recommend _not_ tying off the tarp ridge line too tight. First, the thin line is more likely to dig into the bark, leaving a mark, or worse, damaging the phloem and possibly the cambium layer. Second, you can potentially damage your tarp tie-out points, seams, and edging with too much tension.

      I like to leave the ridge line moderately taut and then get the final tension after staking down the guy lines.

      1. jon Avatar
        jon

        makes sense. thx for your time and expertise! jon

  9. Dave Burton Avatar
    Dave Burton

    Recently downloaded your book and Android app…the app totally changed the game for the perfect sleeping angle, many thanks! I’ve been thinking about this continuous ridge line thing, but I’ve been trying to stay with only rope and knots for a while (since I figure if I switch to hardware now I’ll never have motivation to get the essentials fully down!). Anyways, I was wondering what your thoughts are on replacing the carabiners with small loops of paracord (or other rope)…I was imagining a 6-inch segment of cord or so with a figure-8 stopper knot on one side and then a strong noose-type knot (such as the poacher’s knot) on the other side so I can just loop the noose over the stopper knot and pull it closed, not entirely dissimilar to how a carabiner functions (hope that makes sense). I saw your plans for the ridge line without hardware, which look great, but I kind of like the idea of using the prusik and not having to run the line all the way through the tarp tie outs in this method….anyways, if you have any thoughts on using cordage for substitute carabiners I’d love to hear them!

    1. Derek Avatar
      Derek

      You can use soft-shackle carabiners. They are very common and a great idea for hardware replacement for saving weight. They aren’t as convenient, but they work. If you use 7/64 or larger Amsteel, you can use them for human weight. Other cordage will vary.

  10. jeff w Avatar
    jeff w

    Thanks Derek! I think I get this now. I’m still new to the hang. In my head, amount of line I need for system with two biners: 10′ for my ridgeline (144″ hammock) 7′ for each whoopie sling, 8′ to go around each tree = 40′ total. Hey, do you often run into 3′ diameter trees? and are they usually near much smaller trees?

    Do you keep the lines wrapped into the tarp or separate tarp and lines?

    Do you keep your underquilt & bugnet clipped on your hammock when stuffed in your backpack?

    For a 9 x 12′ long plastic tarp, do you recommend 4, 6 or 8 guy lines?

    1. Derek Avatar
      Derek

      The straps are location-specific, or can be. In my neck of the woods it’s mostly Ponderosa Pine, which can get thick in old growth areas. But, happily, there are usually smaller trunks from which to hang from, so there have only been a few times where I’ve been “forced” to hang from a big tree.

      On my tarps, I keep the guy lines attached. I wrap them individually so they don’t tangle, and pack them with the tarp. If I use a continuous ridge line, I wrap and pack that separately.

      Some folks keep their quilts attached to their hammocks and pack them together. You either have to use a big stuff sack (aka Lazy Slug Tube), or stuff directly into your backpack. Much depends on how you pack your gear to make this happen. For example, if you want to reduce set-up time by clipping your tarp directly to your hammock suspension, I would pack my insulation separately because it’s too easy to get your insulation wet otherwise.

      Personally, I like to keep my insulation separate from my hammock when I pack. It helps me keep them cleaner and dryer and if I want to siesta in the middle of the day and not pull out my insulation, I can do that.

      Some external bug nets can get bulky if you keep them attached to the hammock so you’ll need to be prepared with a bigger stuff sack. If you are doing a multi-day trip, it is much more convenient to keep the bug net attached to reduce set-up time. When I tested the BIAS Buginator net, I kept it attached to my hammock. It was small enough that it packed well in my double-sided stuff sack.

      I prefer simplicity in my set-ups, which is one reason I prefer diamond or asym tarps because it means less guy-out points and less stake points, etc. Catenary cut edges on higher-end tarps also help eliminate flappy edges without using more stake points. You will have to use as many guy points as necessary for the size of your tarp, so plan accordingly.

  11. […] a ridge line where you can clip the bug netting. The line isn’t long enough to be used as a continuous ridge line that some folks are probably familiar with, but it will reach the hammock suspension, which works […]

  12. Johan Avatar
    Johan

    Great setup for a CRL, my Superfly loves it ( me to by the way ) 🙂

    I´m wondering if you was thinking about making a video on how to pack the tarp up using a stuppsack and/or a double sided stuff sack?

    Would love to see how you do it as i myself most often ends up dumping one side of the tarp on the ground.

    Cheers from Sweden.

    1. Derek Avatar
      Derek

      I’ve been asked this before. I need to do a video to show how I do it. I unclip one end and pull the tarp taut against the opposite tree and then pack as I walk to that other tree. Easier seen than described?

  13. Johan Avatar
    Johan

    Hi Derek.

    I read on HF how you pack your tarp up, but for me it dosen´t work as planned.

    What i do is i unhook the side with the flyz on first and start to stuff the tarp, but as the tension on the loosens the whole end ( the one with the “loop” on for the Dutch hook ) just falls to the ground….

    Granted i use the original stuffsack but i can´t see that beeing the problem, or?

    Do you hold the line to keep tension on it when stuffing or am i missing something?

    And yes, a video would be much easier to understand, at least for me 🙂

    / Johan

  14. Allan Green Avatar
    Allan Green

    Derek,

    I have used the continuous ridgeline described above with the prusik knot and the carabiner ever since I saw your illustration. I have been using a nylon 1/8 inch rope, 30 feet long. I have a Hennessy hex fly that I removed the original cord from. I recently got some dyneema rope and tied the prusik with some small cord that I used for the tie outs and the stakes. I find that the dyneema is so slippery that the prusik knot does not lock the way it should, but just slips down the line.

    Do you have any suggestions on the use of dyneema as a ridge line?

    Thanks
    Allan

    1. Derek Avatar
      Derek

      Yes, I hear you! I’ve had the same issue. Using the same Dyneema cord for the prusik. You could also try a klemheist knot

      1. Christiaan Avatar
        Christiaan

        I had that same problem. The dyneema itself is increadibly slippery. Rathern then taking a pice of dyneema as prusik, I now use a 2mm thick piece of nylon, and tie that into a triple pass prusik. It is now the weak link in my setup, tensile strength is far below the dyneema. But so far, it has held. YMMV ofcourse.
        Might eventually try a klemheist with dyneema though.

        1. Derek Avatar
          Derek

          I have switched almost entirely to the klemheist knot.

  15. […] first and probably most important mod out of the two is the Continuous Ridgeline. This is simply a ridgeline that allows the user to wrap each end around a post/tree/pole and pull […]